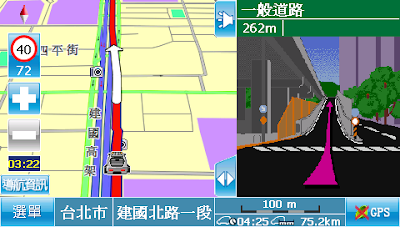
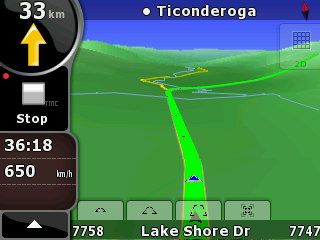
Nav N Go 過去兩年可謂勢如破竹,除了台灣的 Mio、Novogo、Asus 在歐美推出的 PND 搭配採用 iGo;一些歐、美、日廠商搶搭 PND 順風車,也是採用 iGo。但各家版本除了 UI 稍有不同,其實內部引擎都是 iGo 2006 (Plus)。
期待已久的 iGo 8 終於在 CES 2008 正式發表,除了眾所周知的 3D 導航之外,整個 UI 猶如改頭換面。
讓我們來看看一些畫面。

由於 iGo 2006 (Plus) 功能強大,各種設定讓許多初次接觸 iGo/MioMap 的使用者目眩神迷,因此新版 iGo 8 特別設計了兩種模式,進階使用者可以進入 Expert Mode,初學者最好等基本導航玩熟了再來玩更多的選項。

這便是 Expert Mode 的主選單。

在 Find 選單裡多了座標導航的功能。

Route 選單多了 Load Route 與 Save Route。此外,路徑規劃完後,變成要 Menu > Route > Simulate 來模擬導航,相信許多 MioMap / iGo 的使用者一定會不習慣。

My Data 則將使用者的各種資料(最愛、景點、路徑規劃、路徑軌跡)集中管理。iGo 8 新增了路徑規劃與搜尋條件的儲存。

設定選單,各項功能畫面省略。

此外,從 Find 選單右下角進入 Plan Mode,點選地圖任何一處便可以設為起點、經由、或目的地。

讓我們先看看導航畫面吧!這才是精華所在。如同 iGo 2006 Plus,畫面上各個圖案都有它的功能。

左邊從上而下,首先是衛星狀態,點選後當然是‧‧衛星狀態的畫面。不過這個圖示在導航時變成轉彎提示;此外,它還可以用來切換 Automatic recalculte 與否。

接下來,點選第二個轉彎提示(「禁止左轉」)處會進入路徑列表。

點選時速、時間處,則進入更詳細的行程資訊畫面。

點選左下方的衛星訊號與車子所在的圖案則帶您進入 Cockpit 設定,在這裡可以選擇音量大小、靜音、日夜模式、3D 建築、全畫面導航、與軌跡紀錄的設定。跟通訊有關的 GPS、TMC、Bluetooth 設定則一律放在下方。

導航畫面的右方按鍵,最上方是 3D/2D 切換。

Detour 就不介紹了,Menu 回到主選單。

當選擇好目的地之後,或是衛星定位後,以及導航中,點選 Cursor,則是根據目前位置選擇三個基本功能。

或是按 More Options..

如果選擇 Route to.. 接下來便出現四種規劃結果,是不是似曾相識?

當設定好目的地,便可以檢視 Route Information。

導航畫面的上下仍是用來顯示目前路名與待轉路名。此外,點選上下這兩處路名的圖示或地圖上任何一處,則出現四個預設縮放的控制選項,分別為近、中、遠、與關閉。

點選左下方的箭頭,則打開左右旋轉、俯視角度、與畫面縮放的開關。

2D 的模擬導航雖然不再吸引人,但長途路線而無須轉彎時,自動切換到 Overview Mode 的功能卻很實用。

這張圖很特別!筆者說的可不是右方顯示的「Big Ben」,而是下方顯示的路名似乎還包括門牌號碼。此外,上方的雙向車道指引,也是第一次看到。

下面這張也是顯示目前所在的地址,加上前面這麼清楚的 3D 地標,您還找不到倫敦最熱門的景點,只好怪自己了。

先前 iGo 8 有張巴黎鐵塔的「模擬完成圖」,路網看起來相當細緻。雖然完成後的 iGo 8 在 320x240 的畫面上無法跟 HP iPAQ 310 的 800x480 相提並論,但 3D 建築之多可見 iGo 不是每個國家做一個景點來唬人的。

大家猜猜這張是哪裡?提示:相信常人如你我是不可能將車子直接開到門口的。

搭乘渡輪也是 iGo 路徑規劃本來就有的選項,不過還是第一次看到這樣的左上方圖示。

除了這些畫面之外,iGo 8 當然還有許多沒有介紹的功能,例如 Animated menu(動態選單)、可更換選單背景等等。如果這些圖片還不過癮,不妨看一下
官方網站的圖片特別值得一提的是,iGo 8 採取地圖與 POI 分開的做法;必要時,可以更新 POI 而不影響地圖,反之亦然。
相信許多 MioMap / iGo 的 fans 一開始一定不能適應這個新的 UI,但整個 UI 如果有系統地了解一遍之後,其實不難在兩三天內熟悉。但最令筆者受不了的是,目前尚無美國版 TeleAtlas 3D 圖資,iGo 8 千呼萬喚始出來,猶抱琵琶半遮面。


